
Article and tips
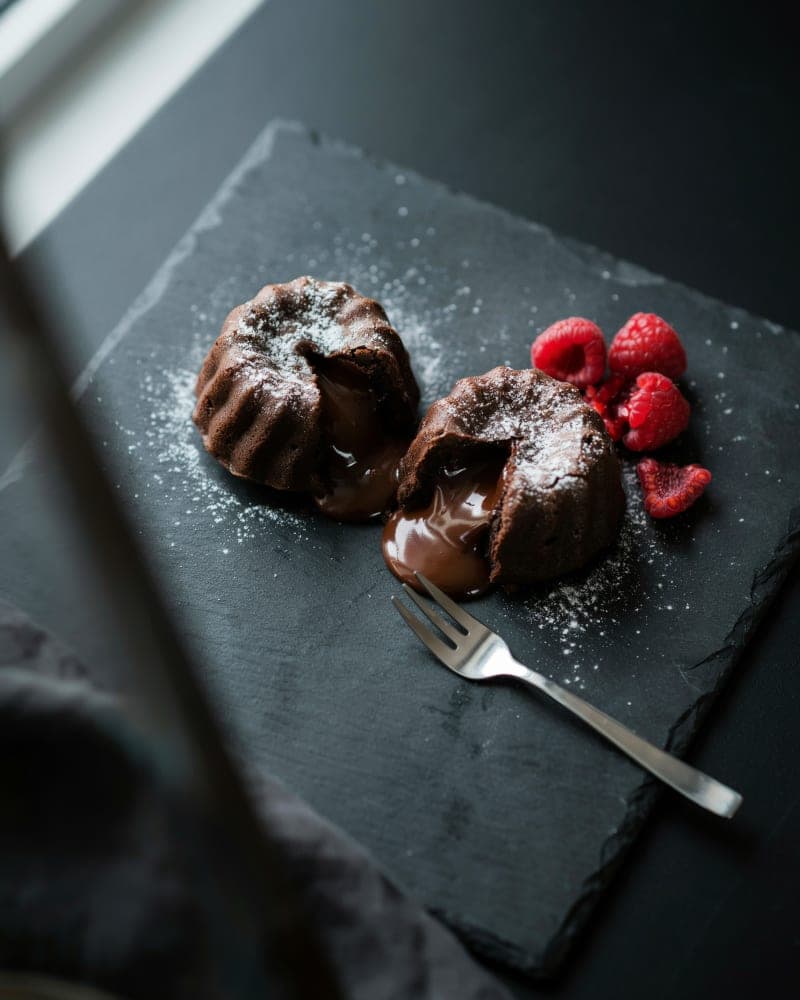
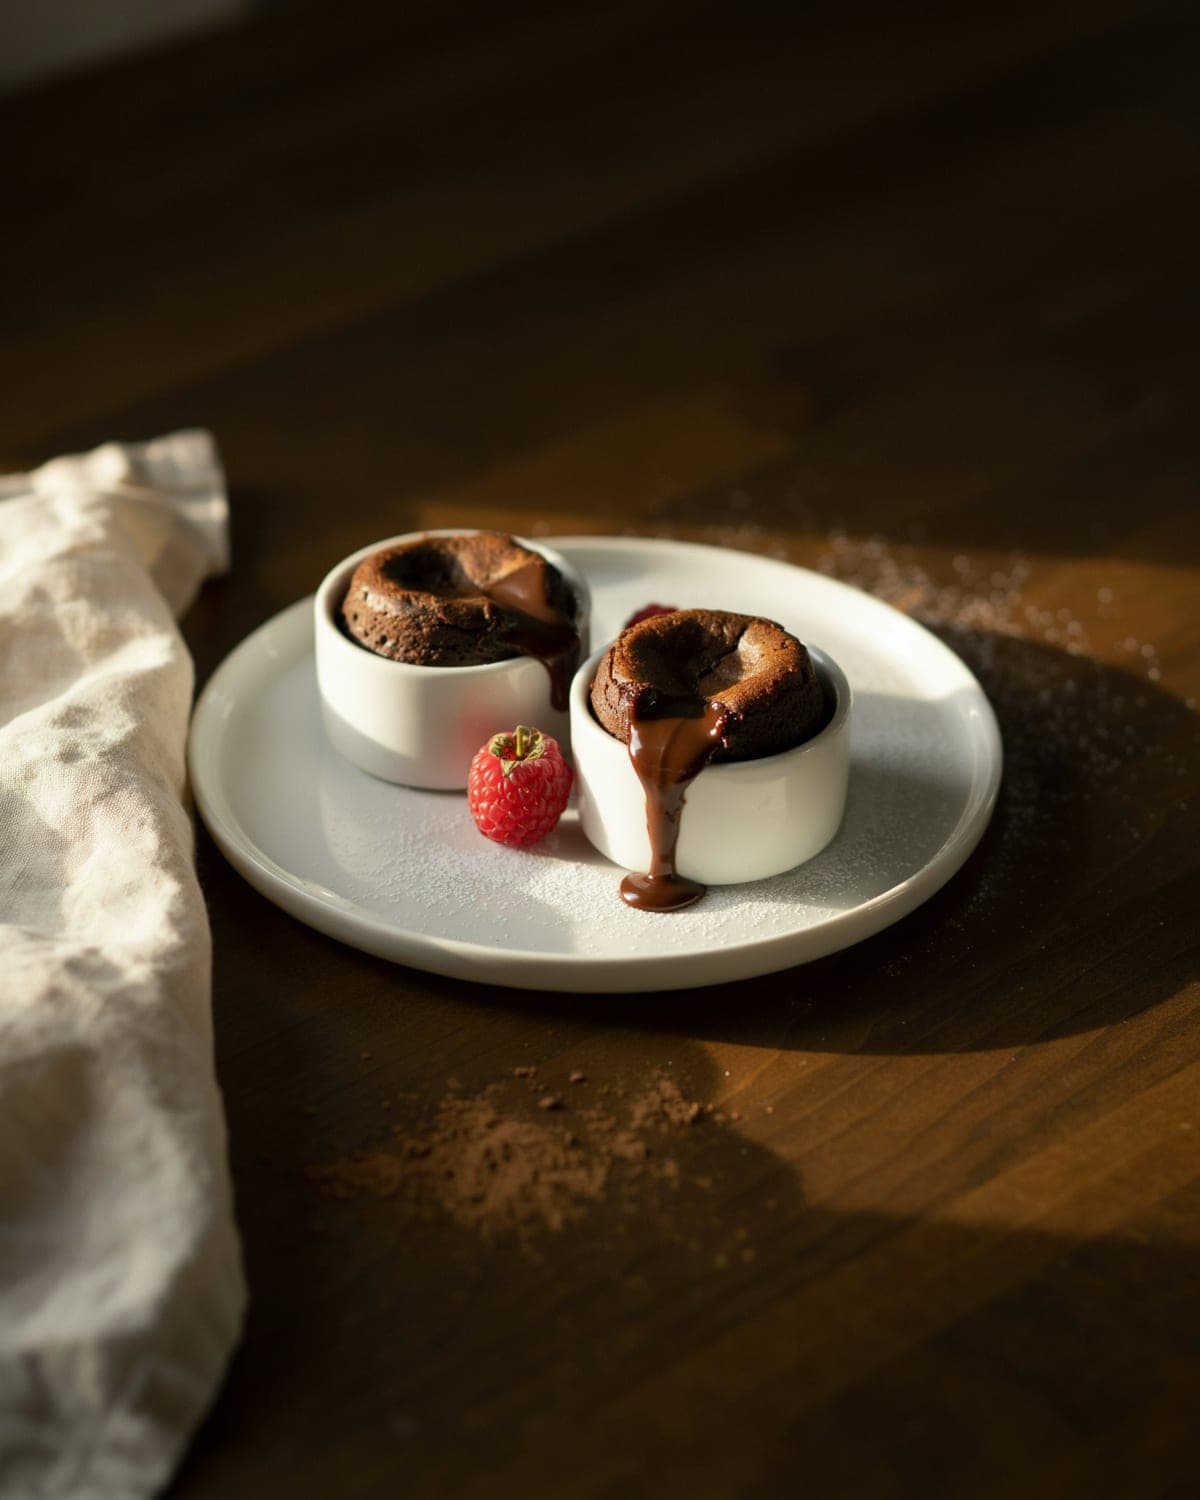
The first time I made dessert for two just two people, I baked four — and then stared at two plates of abandoned dessert for two, slowly solidifying into a sad, cold puddle. Scaling down a dessert shouldn't mean drowning in leftovers or guessing at ingredient math. After a dozen Friday nights of trial (and more than a few underbaked hockey pucks), I landed on a 30-minute recipe that gives you exactly two individual cakes, each one a warm, dark well of glossy chocolate, with just six pantry ingredients you likely already have. No leftover temptation, no fuss, just a date-night showstopper that feels far more luxurious than its effort suggests.
Why This Works
Lava cakes are a magic trick of baking — a thin, cakey shell surrounding a still-liquid center. The key is high heat and exactly the right bake time. At 425°F, the exterior sets quickly while the interior remains molten. Unlike a soufflé, there are no separated eggs to beat into stiff peaks; the whole egg and extra yolk whip into a thick foam that sets the structure. The chocolate and butter ratio (1:1 by weight) gives a silky mouthfeel, and a small amount of flour adds just enough body to prevent collapse. I've tested this with both bittersweet 60% and dark 70% chocolate — the latter makes a more intense, less sweet center, but both work beautifully. The difference is like night and day: 70% gives you a truffle-like depth, 60% keeps the crowd-pleasing balance.
A hot oven is non-negotiable. I once tried a 375°F bake to “play it safe” and ended up with chocolate muffins that had no molten core at all. The center never reached the liquidity point. So crank it — 425°F creates that dramatic contrast. The eggs provide the lift; if you're at high altitude, reduce sugar by a tablespoon to prevent over-expansion and cracking.
ze. Don't use chocolate chips — they contain stabilizers that prevent proper melting and will make the batter grainy. The butter must be unsalted so you can control the salt yourself; a tiny pinch of Diamond Crystal kosher salt (the fluffier, less salty kind) amplifies the chocolate's fruitiness without making it taste salty. The eggs and yolks should be at room temperature — cold eggs won’t whip to the same volume and can cause the melted chocolate to seize. Set them on the counter 30 minutes ahead, or submerge in warm water for 5 minutes. For the flour, all-purpose works, but I've tested with cake flour and found no improvement; the tiny amount is just for structure. If you want a gluten-free version, swap in a 1-to-1 gluten-free blend — the texture tightens slightly but still delivers a fudgy medallion. And I always add a whisper of vanilla, not because you’ll taste vanilla explicitly, but because it rounds the edges of the chocolate, like a bass note you feel more than hear.
What Most Recipes Get Wrong
Most lava-cake recipes share an odd pattern: almost none of them mention the food-safety reality of a molten center. USDA guidelines say eggs should reach 160°F for safety; a jiggly lava cake center hits around 130-140°F. Yet the recipes blithely serve undercooked eggs without a word. That's the gap I'm closing. I still deliver the molten payoff, but I tell you exactly how to make it safely with pasteurized eggs — and give you a 3-minute bake extension if you want fully set, no-runny centers without trashing the entire dessert. I also spot a lot of recipes that overestimate the sugar. To my palate, ¼ cup is the sweet spot (pun intended) — enough to balance the bitter chocolate but not candy-coat it. And those recipes that say “bake 8-10 minutes” are often wrong; time depends on ramekin size, oven hot spots, and altitude. I'll give you visual cues you can trust.
Chef's Tips & What I've Learned
Chef Augustin's Tip: The ramekin butter-and-flour technique is the unsung hero. I brush on softened butter in a thin, even layer, then coat with flour and bang out the excess. For a deeper chocolate dusting, swap flour for cocoa powder — it adds a velvety exterior and camouflages any tiny flaws when you invert.
Chef Augustin's Tip: If you're making these for a special evening, you can refrigerate the filled, unbaked ramekins for up to 4 hours ahead. Pull them from the fridge, let them sit on the counter while the oven preheats (about 20 minutes), then bake as directed. They'll need an extra 1-2 minutes to bake through. I've done this for anniversary dinners and it eliminates last-minute stress.
A warm plate isn't just for restaurants — it keeps the lava center molten longer. Run your plates under hot water and dry them before inverting the cakes.
FAQ
Can I use milk chocolate instead of bittersweet?
Yes, but you'll need to reduce the sugar by half (2 tablespoons) because milk chocolate is much sweeter. The lava center will also be thinner and less intensely chocolatey. Don't use white chocolate — its fat profile is completely different and the cake won't set properly.
Why didn't my lava cake have a molten center?
You likely overbaked it. Even 1 extra minute at 425°F can turn the center from molten to fudgy. Set a timer at 12 minutes and use the jiggle test. Ovens vary; I've tested this in three different kitchens and the sweet spot ranges from 12:00 to 14:15. Check early.
Can I freeze lava cakes?
Unbaked, yes. After filling the ramekins, wrap tightly in plastic and freeze for up to 1 month. Bake straight from frozen at the same temperature, adding 3-4 minutes. Baked and inverted lava cakes don't freeze well — the center loses its liquidity upon thawing.
What can I serve with lava cakes?
A small scoop of vanilla ice cream is classic for contrast. A dollop of lightly sweetened whipped cream or crème fraîche cuts the richness. Fresh raspberries add a tart burst. For an elegant twist, dust the plate with a little fleur de sel — the salt spikes the chocolate's fruit notes.
How long do leftovers last?
Baked lava cakes are at their peak within 10 minutes of coming out of the oven. If you have one left, wrap it in foil and refrigerate; the center will firm to a fudge-like texture. Reheat in a 350°F oven for 5-8 minutes, but don't expect a full lava return — it will be a warm, fudgy cake instead. Still delicious, but a different dessert.
Is this recipe safe to serve with raw eggs?
The centers do not reach the USDA-recommended 160°F for egg safety because they're meant to remain molten. For vulnerable diners, use pasteurized eggs (available in the shell at many grocery stores) or bake for the full 15 minutes until set. The taste and texture hold up beautifully with pasteurized eggs.
Can I double this recipe?
Yes, exactly double all ingredients for four cakes. Use four ramekins and keep the same oven temperature and baking time. The batch will bake evenly on one sheet. For more than four, bake in two batches to maintain the oven's heat recovery.
The first spoonful sinks through a few millimeters of delicate cake, then meets a pool of warm, glistening chocolate that spills out like a slow exhalation. Across the table, your person catches the moment — a tiny smile, a tilt of the head. That's when you realize a simple plate of chocolate can hold more weight than you planned. The dishes will wait. The night is just getting started.